The first thing you must do is right click the My Network Places icon and select Properties.

This will bring you to the Network Connections window which displays a list of your current network connections. Double click the New Connection Wizard icon.
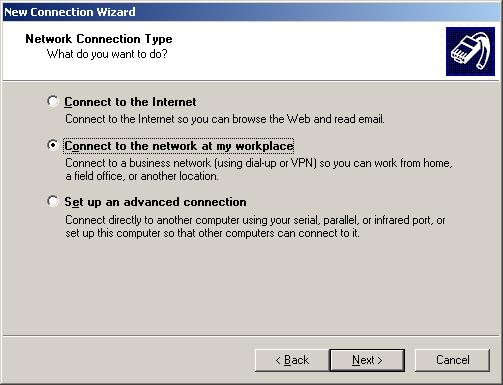
You are faced with three options – choose the second one, “Connect to the network at my workplace” and click Next.
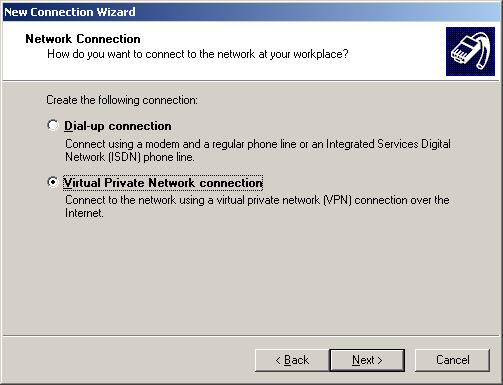
Now choose the second option, “Virtual Private Network connection” and click Next.
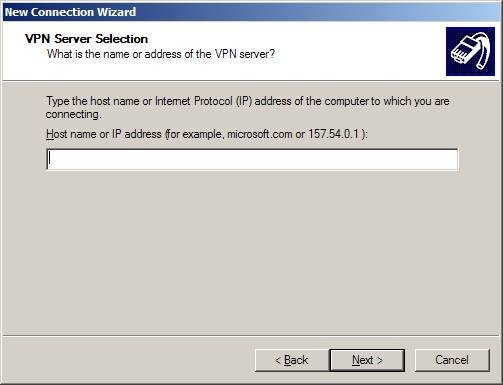
This will bring you to the window in which you should enter the name of the company or server you will be connecting to. After you have typed the name in, press Next.

This will bring you to the following window in which you must enter the host name of the VPN server: vpn.vpnvip.com or us.vpnvip.com or cn.vpnvip.com or uk.vpnvip.com
And finally, the “Connection Availability” window will allow you to select who is authorized to use the VPN connection. “Anyone’s use” will permit anyone who logs onto the system to use the connection, whereas “My use only” will limit it’s use to you only.

Once you click Next and Finish, your new connection will be visible in the Network Connections window (as seen below).
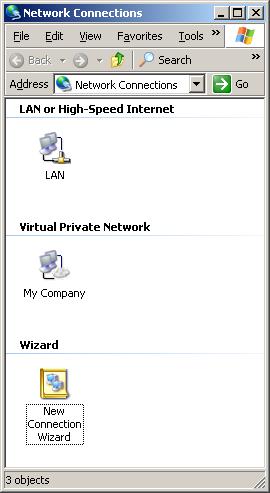
Right click the new connection and select properties to open the properties window. Here, you can configure, amongst others, the network settings and general options.
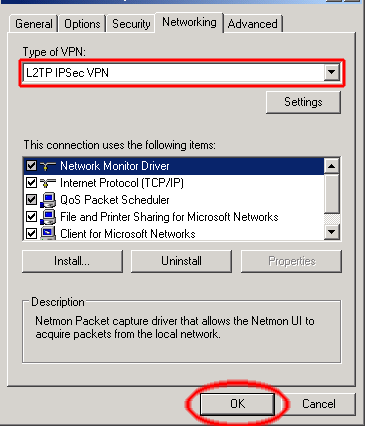
Select the Networking tab and in the “Type of VPN” drop down list, choose L2TP VPN.
Click the Security tab, then click the “IPsec Settings…” button:
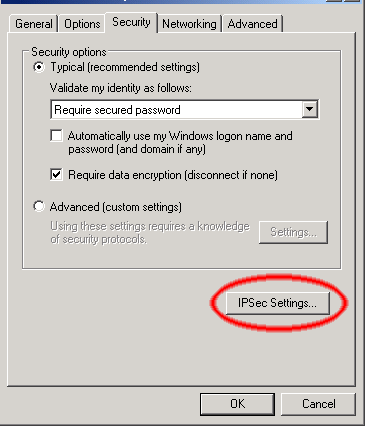
In the next window, click the checkbox and type “VPNVIP” as the key and click OK.

Press OK to close the window and return to the network connections window.
If you double click your VPN connection the logon window will appear.

Enter your username and password and click Connect.
After the authentication process is complete, you will be logged on to the VPN Server and two computers will appear at the bottom right hand corner of your screen (default).

Congratulations! You have now successfully been connected to the VPN server.


